In the dynamic landscape of cybersecurity, attackers are adept at exploiting vulnerabilities, and one critical avenue they often use is the absence of essential controls within a Microsoft 365 environment. This blog explores how three overlooked security controls in your Microsoft 365 environment can help attackers gain initial access to your environment, find sensitive information that shouldn’t be accessible, and escalate their privileges within your Microsoft 365 ecosystem. Understanding the tactics behind these maneuvers is crucial for organizations aiming to fortify their defenses and thwart potential threats at every stage of an attack. Let’s delve into it!
TL;DR
- Check your MFA coverage to avoid unauthorized initial access,
- Discover Microsoft 365 and Security groups that are open to join to avoid sensitive information disclosure and privilege escalation,
- Find any misconfigured SharePoint sites to avoid sensitive information disclosure.
MFA Coverage Gaps
Multifactor authentication (MFA) is the most critical control in your Microsoft 365 environment. As stated by Microsoft, setting up MFA for all your users can prevent 99% of attacks on your accounts. For that reason, all M365 security assessments should verify if you have MFA enabled in your environment. But a question that is often neglected is: Where are the coverage gaps? In other words, are there any user accounts that MFA may not protect because of a misconfiguration, a misunderstanding, or an oversight?
So, how can you check your MFA coverage? Let’s understand two different ways that can introduce such a coverage gap.
Per-user Microsoft Entra multifactor authentication
Even though this method is no longer recommended by Microsoft (as it is now considered legacy), we sometimes see customers’ environments with what is called “Per-user MFA”. As explained in Microsoft documentation here, per-user MFA is when MFA is enabled on a per-account basis. This can be configured through the Microsoft Entra console by navigating to the Identity section > Users > All Users, then clicking on “Per-user MFA”; or browsing directly to this URL: https://account.activedirectory.windowsazure.com/usermanagement/multifactorverification.aspx.
Once in there, you can see whose accounts have MFA either disabled, enabled, or enforced. From this portal though, and as you can see below, it is not possible to filter accounts with an MFA status of “disabled” (thanks, Microsoft…):
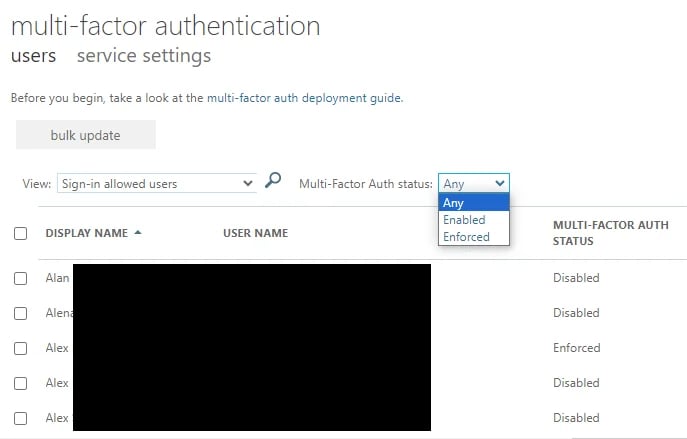
So, how can you extract a list of all accounts where per-user MFA is disabled?
Thanks to The Sysadmin Channel, you can use a PowerShell script to extract this information: https://thesysadminchannel.com/get-per-user-mfa-status-using-powershell/. After installing the requirements, the following command can be used to get a nice CSV list of all accounts with their MFA status:
.\Get-PerUserMFAStatus.ps1 | Export-Csv -Path org-per-mfa-details.csv.
From Excel, you can now filter on the “Disabled” state and go through the list of accounts where MFA is not enabled:
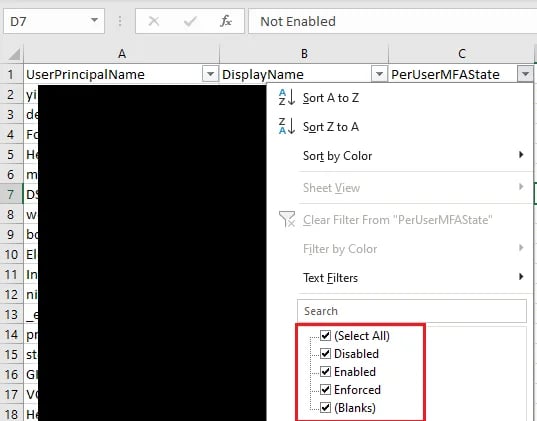
Do you have any user accounts with their MFA status set as disabled? If yes, you have a coverage gap; if not, you’re good to go on this one!
Conditional Access policies
Using Conditional Access policies to enable MFA is the recommended approach to protect users, but it requires a Microsoft Entra ID P1 or P2 plan. As per-user MFA, this approach can also have a coverage gap depending on how the CA policies are defined. This is often the case when the policy enforcing MFA is not configured to apply to “All users”. In other words, when the policy is enforced for specific groups, all active accounts not in these particular groups will not be protected by MFA.
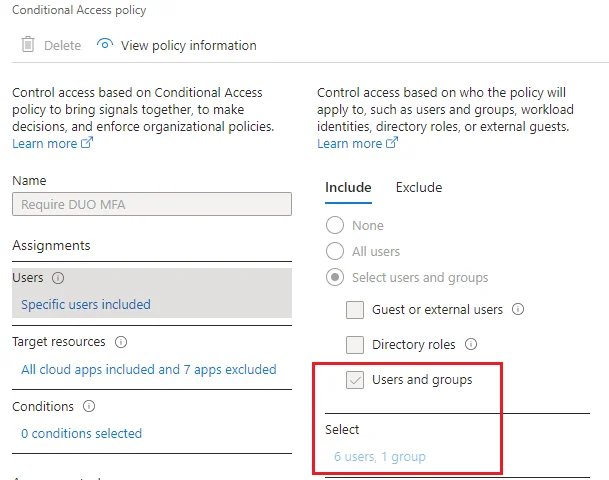
So, how can you understand how many accounts are not protected by such a policy? Well, the Microsoft Entra Admin center gives us everything we need this time:
- You can download a list of all users in your tenant from the Identity blade > Users > All users.
- You can download the list of users in the associated group(s).
- And you can then use Excel to compare the two lists and see which entries are not duplicated.
There you go, you should now know if you have an MFA coverage gap if using Conditional Access policies.
What to do next?
Now that you understand if you have a gap in your MFA coverage, the next step is to remediate it. Here are some suggestions for you to consider:
- If you have a Microsoft Entra ID P1 or P2 plan but are configuring MFA using the per-user approach, now is the time to migrate to Conditional Access policies. You will get much more flexibility from it, so take the leap!
- If you use Conditional Access policies, prefer to include “All users with specific exclusions” rather than “include only specific groups”. In the long term, the former option will likely provide more coverage than the latter.
- Last but not least, run periodic reviews of your MFA coverage, at least on an annual basis. Depending on your implementation option, this shouldn’t take too long, and if it can avoid you a very bad weekend in the future, it’s definitely worth it.
Open to join groups
The second topic I want to discuss is Security and Microsoft 365 groups that are configured as open-to-join for all users. This particular topic is not very well known and can introduce important risks in your environment. Let’s delve into it.
Microsoft 365 defines different types of groups for different purposes:
- Microsoft 365 Groups are used for collaboration between users, both inside and outside your company.
- Security groups are used to grant access to resources, for example SharePoint sites.
- Distribution groups are used for sending email notifications to a group of people.
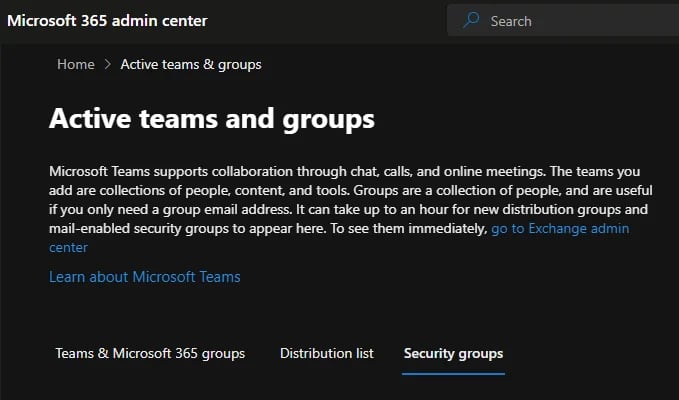
These three types of groups can be browsed from the Microsoft 365 Admin Center:
https://admin.microsoft.com/Adminportal/Home?#/groups.
Depending on how these groups are created, users in your tenant may be able to join these groups without requesting anything from the group owners. This type of group is what Microsoft calls: “open to join for all users”.
For Microsoft 365 groups, this is seen as the privacy level of the group. Here is a screenshot of a Microsoft 365 group creation, where this information is shown:
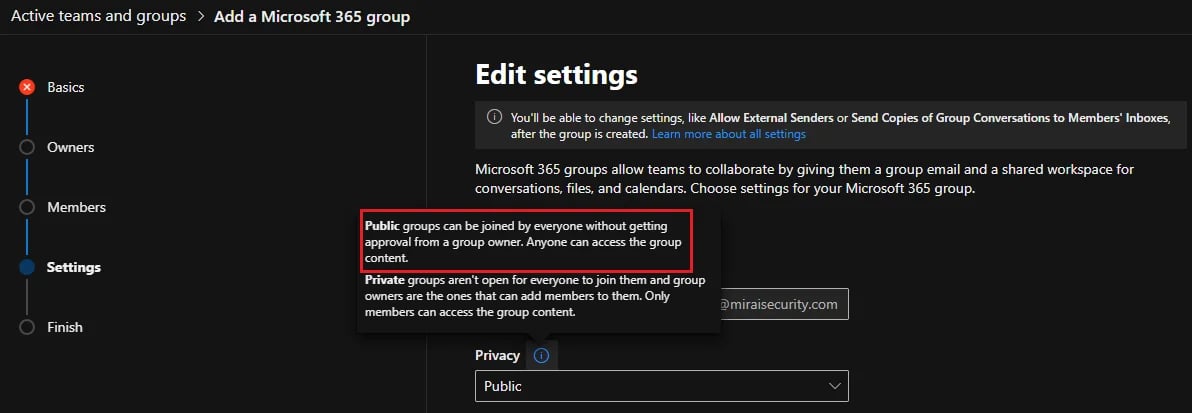
By default, the privacy level is set to Public as shown above, so be mindful of these default settings if you are in a hurry when creating a new group…
For Security groups, it is getting more complicated… If a group is created through either the Azure portal or the Microsoft 365 Admin center, the group will not be open to join for all users. But if the security group is created through the “My Group” application at https://myaccount.microsoft.com/, then the user has to choose a Policy:
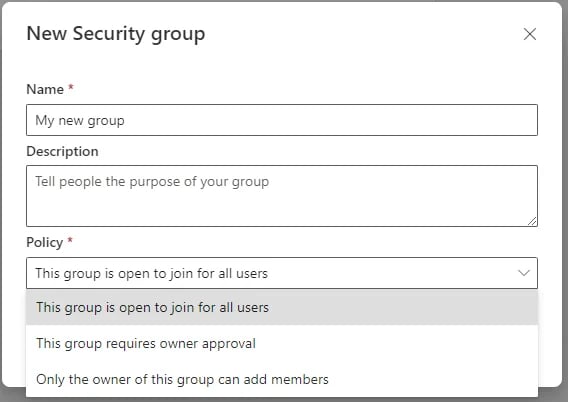
By default, the policy value is not set to anything, so users must deliberately choose the “open to join” option. But seriously, why does Microsoft allow such a feature for groups created through this interface?!
Anyways, Beau Bullock from Black Hill Infosec recently published a great blog post about his tool, GraphRunner, and explains how to identify these types of groups. Using GraphRunner, and more particularly the Get-UpdatableGroups module, we can easily list all “joinable groups”:
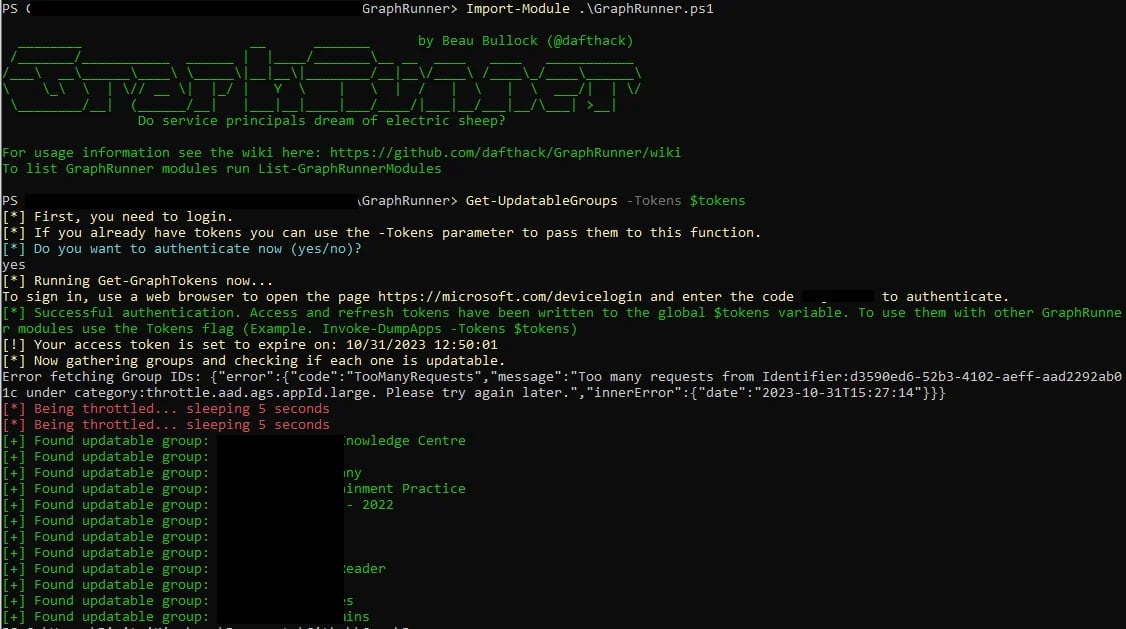
How great is that? Now we can go through this list, understand if users are supposed to be allowed to join the group, and take appropriate actions when necessary.
Why open to join groups introduce risks to your environment?
As explained by Beau in his blog post, open-to-join groups are interesting targets for attackers or pentesters:
- Unauthorized access to sensitive information: depending on how it was created, Microsoft 365 group members may not know that a particular group is public. There is indeed not much information in Teams or SharePoint to warn users when a SharePoint site or a Teams is “public”. So the risk is that users will store sensitive information in these Microsoft 365 public groups without understanding these are actually public.
- Unauthorized access and privilege escalation: depending on how it was created, it is possible a security group that allows users to join, is used to configure Single Sign On for an application, access to Azure resources, in Conditional Access policies, etc. The list goes on: security groups are here to “grant access to resources”, so the possibilities are almost endless in terms of potential impacts… It is therefore very important to understand where these open-to-join groups are being used. Sadly, there is no easy solution to understand where a Microsoft Entra group is actually used. So you will have to investigate in each of the Microsoft consoles and tools. If the name does not suggest a particular use case, check your enterprise applications, your Conditional Access policies, your Azure roles, your SharePoint/OneDrive/Teams consoles, etc.
What to do next?
Except if you have a real use case for allowing users to create their own security groups, you can disable this capability in your tenant. As explained by Microsoft documentation here, this can easily be disabled in your environment by configurating your group settings.
Now depending on the group type, the situation is more or less complicated to remediate:
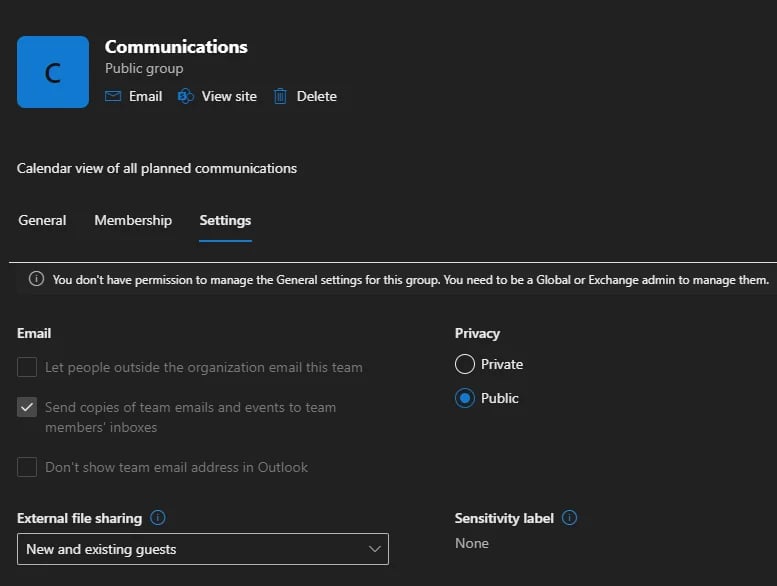
- For Microsoft 365 groups, the privacy settings can be directly modified from the Microsoft 365 admin center, by selecting the group and clicking on Settings. Then just switch the group’s privacy from Public to Private and you should be good to go:
- For Security groups though, privacy settings cannot be changed after creation. So, for each security group that was misconfigured, you will need to recreate the group, make sure to update the application or whatever was relying on that group, and then delete the old security group.
Misconfigured SharePoint sites
The third and last topic I want to discuss is about misconfigured access for SharePoint team sites. This is also something often overlooked, mainly because the list of SharePoint sites can be overwhelming. So, how can you easily spot which ones of your SharePoint sites are potentially misconfigured and accessible to all users?
One easy solution, again, is to use GraphRunner. Thanks to the Get-SharepointSiteURLs module, the list of SharePoint sites accessible to your account can easily be returned. Before running this module though, understand that it will return all legitimate SharePoint sites your account currently has access to. So, if you want to eliminate false positives, I would recommend using a test account with no particular permissions or group assignments.
Here is an example of what the execution of this module looks like:
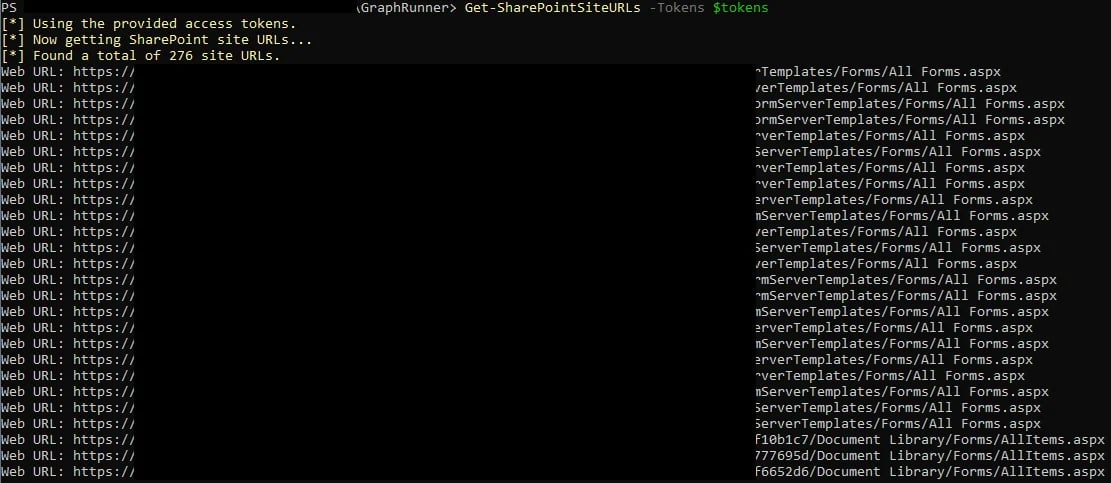
276 site URLs, that looks quite a lot! Hopefully your environment won’t return as many sites as this example.
Why are my SharePoint sites listed as accessible to all users?
If you used your own account and have a very long list, chances are your account has legitimate access to these sites and what you see are mainly false positives. This is why I was recommending running this with a test account not being part of many groups.
That being said, we usually find many SharePoint sites in our customers environments that are misconfigured. From our experience, it either comes from:
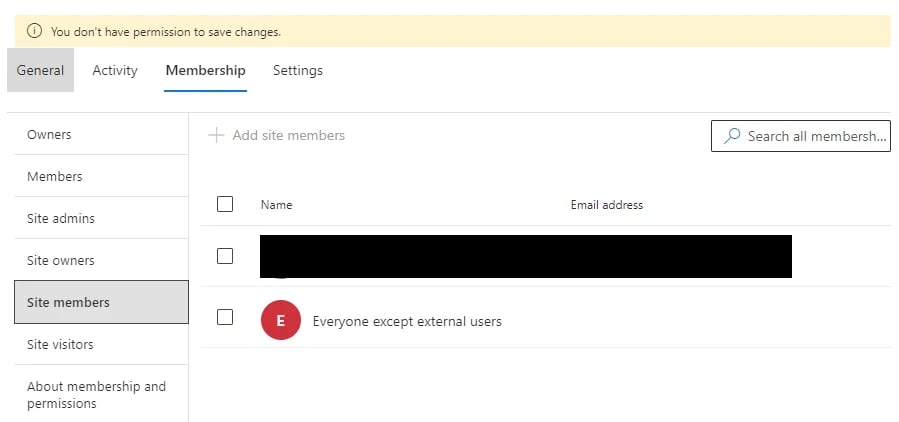
- The Site members. The privacy level can be set to Private, but with the Site members too widely configured. Check these settings to understand if the misconfiguration can come from here. The example below shows the list of Site members where “Everyone except external users” can access this site:
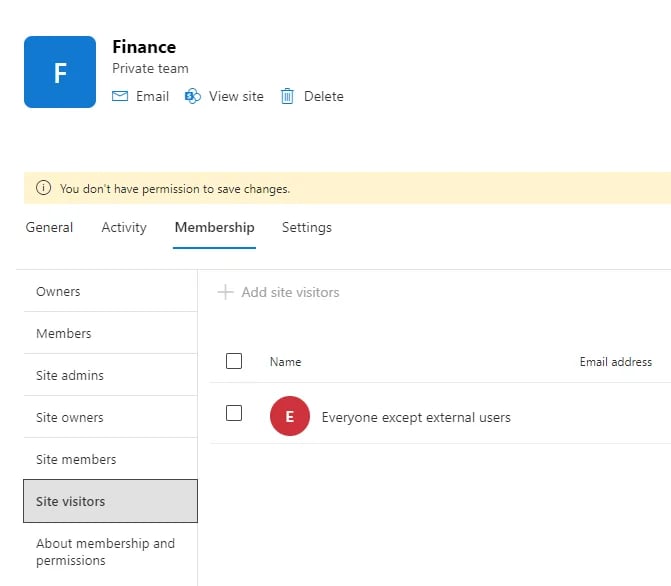
- The Site visitors. Again, the privacy level can be set to Private, but with the Site visitors too widely configured. The example below shows the list of Site visitors this time where “Everyone except external users” can access this site:
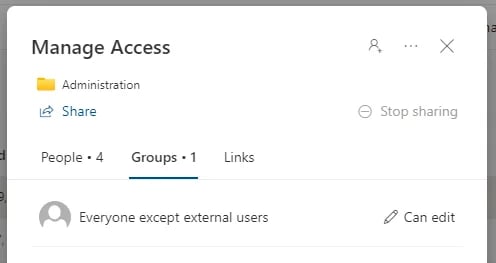
- Finally, SharePoint allows managing access at the folder level. If you don’t see any misconfiguration in the site members or visitors, chances are specific permissions have been set on the folder. Here is an example:
Conclusion
Securing a Microsoft 365 environment is not something easy. Many security controls need to be checked, and we have only described three here that are often neglected. Thankfully, the following tools and benchmarks are available to help organizations assess and improve their M365 security controls:
- Microsoft Secure Score gives you a measurement of your organization's security posture, with recommended actions to take depending on your licenses. If you have never seen your Microsoft Secure Score, now is the time to have a look at it: https://security.microsoft.com/securescore.
- The Center for Internet Security (CIS) maintains and publishes benchmarks for Microsoft 365. These benchmarks are the product of a community consensus process and have defined secure configuration guidelines for Microsoft 365 environments.
Our approach at Mirai Security, is to use the CIS benchmarks for Microsoft 365 as a solid base which we then improve with custom tests and controls based on the latest threats and techniques used by attackers. If you are interested in assessing the level of security of your environment and staying ahead of the attackers, let us know!